How to install Dashboard Bulider in Joomla
This document helps you to understand how to install and configure Dashboard Builder in your Joomla website in easy steps.
Contents
Answer
Requirements
- Joomla 3.8 or later
- Joomla 4.0 alpha or later
- Firefox 52, Chrome 57, IE 8 or later
Answer
Installation
- Download the extension from https://dashboardbuilder.net/joomla-extension
- Login to your Joomla admin
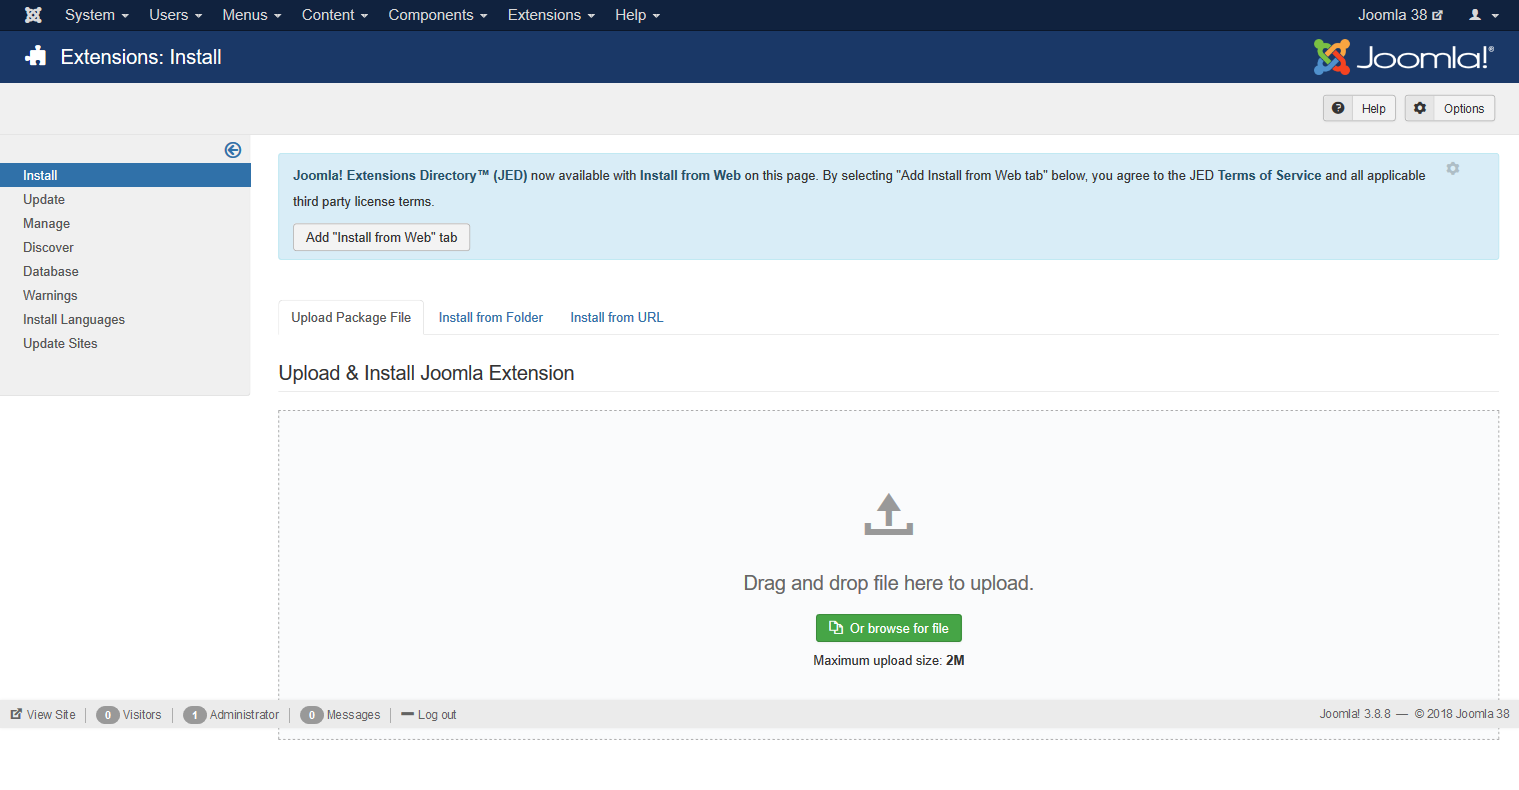
- Click Extensions ->Manage->Install. Following Screen will appear
- Brows mod_dashboardbuilder_j3_j4_v1.zip file
Answer
Create your first Dashboard
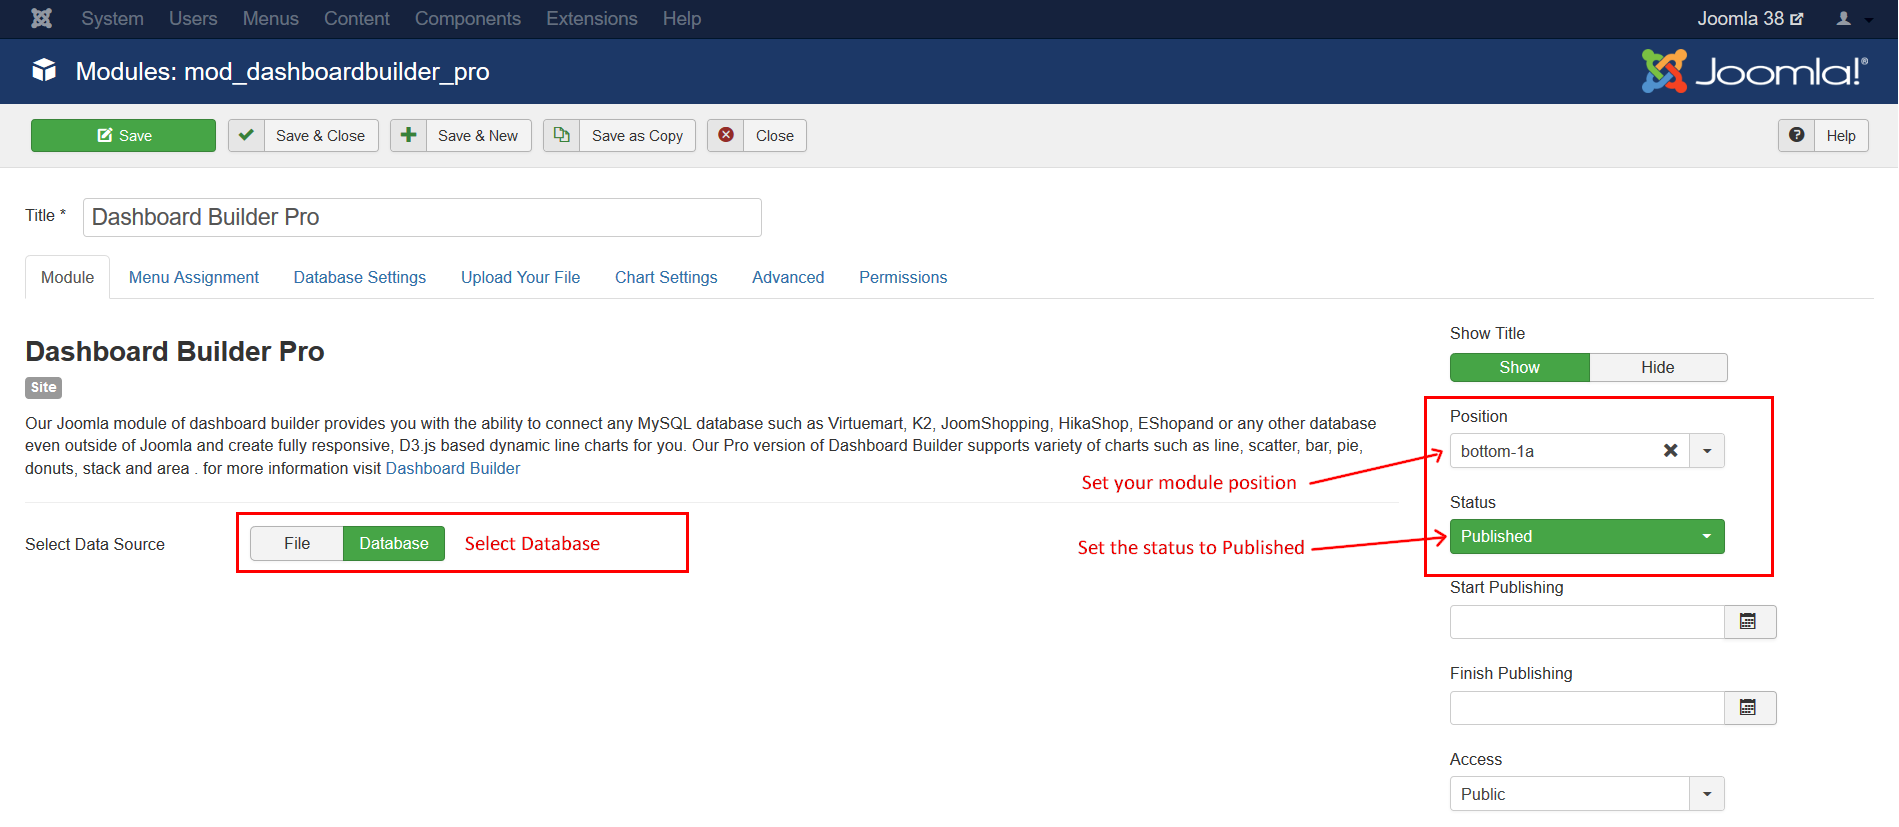
- Go to Extensions -> Modules
- Click Database in the following screen
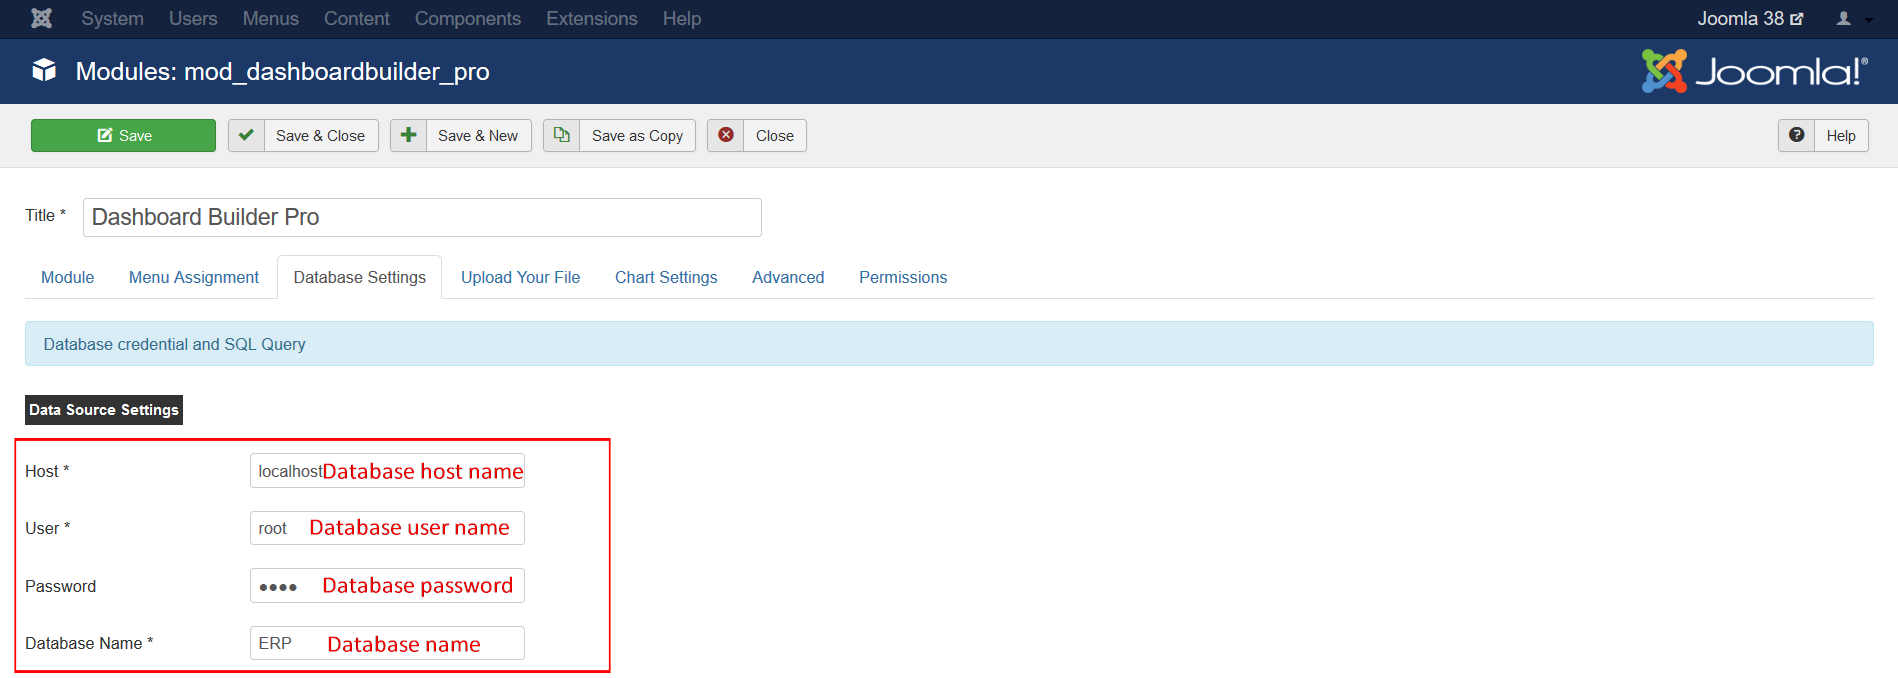
- Now, click on the Database Settings tab
- Following screen will appear
- Enter Host name, user name user password, and database name
- Change the status to Published, select your desired position and assign to your desired page under the tab Menu Assignment
Answer
Write your custom SQL query:
Write your custom SQL query In the SQL Query text box

Answer
Fetch data from an Excel or CSV file
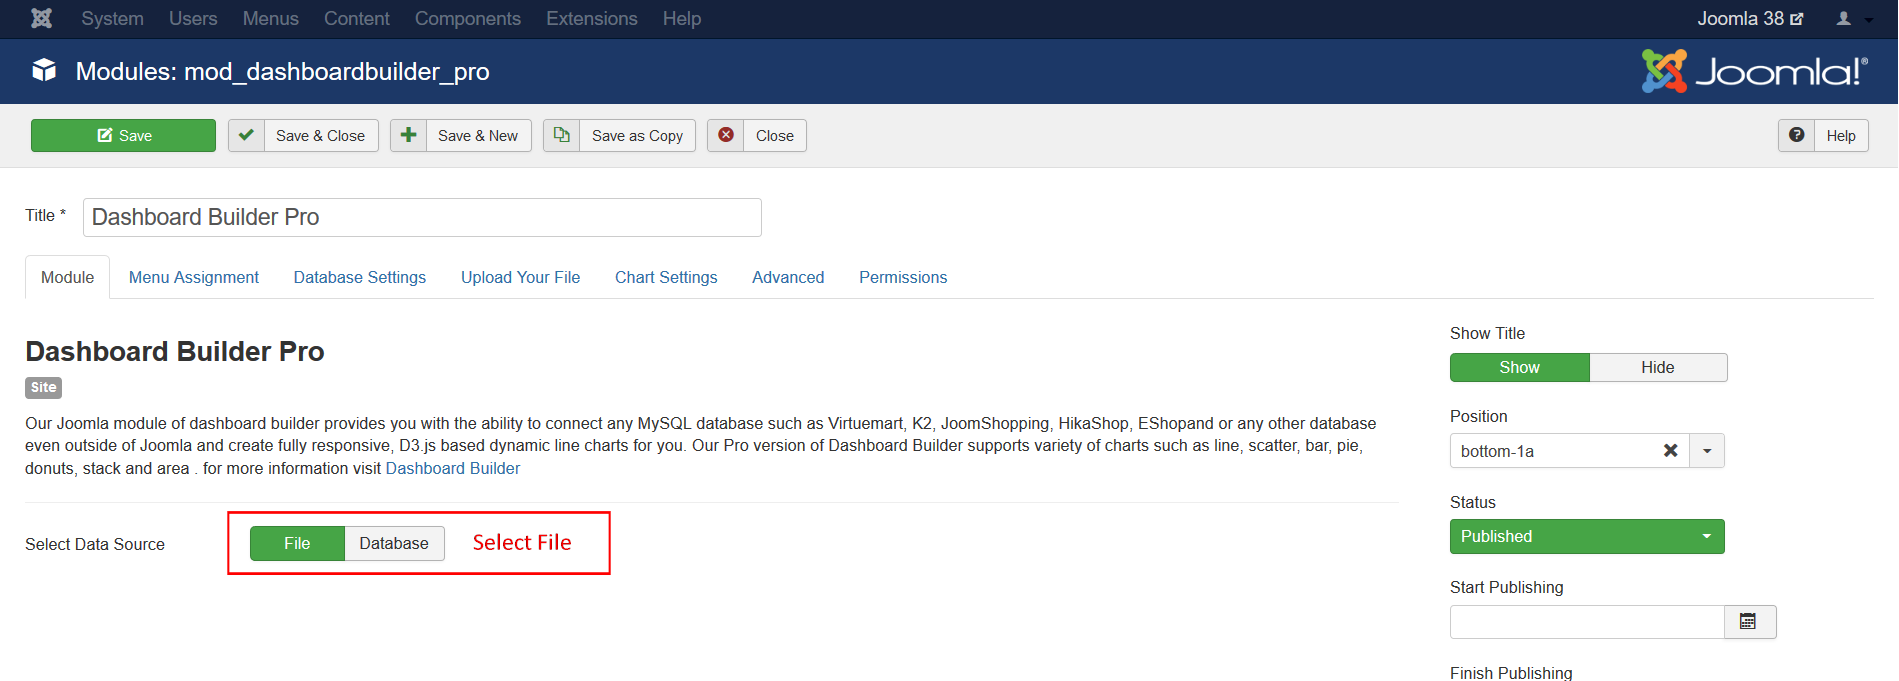
- Select File under the Module tab
- Use any File Manager to upload your Excel or CSV file to the folder
/modules/mod_dashboardbuilder_pro/data/ - Select your file from drop-down list.

Answer
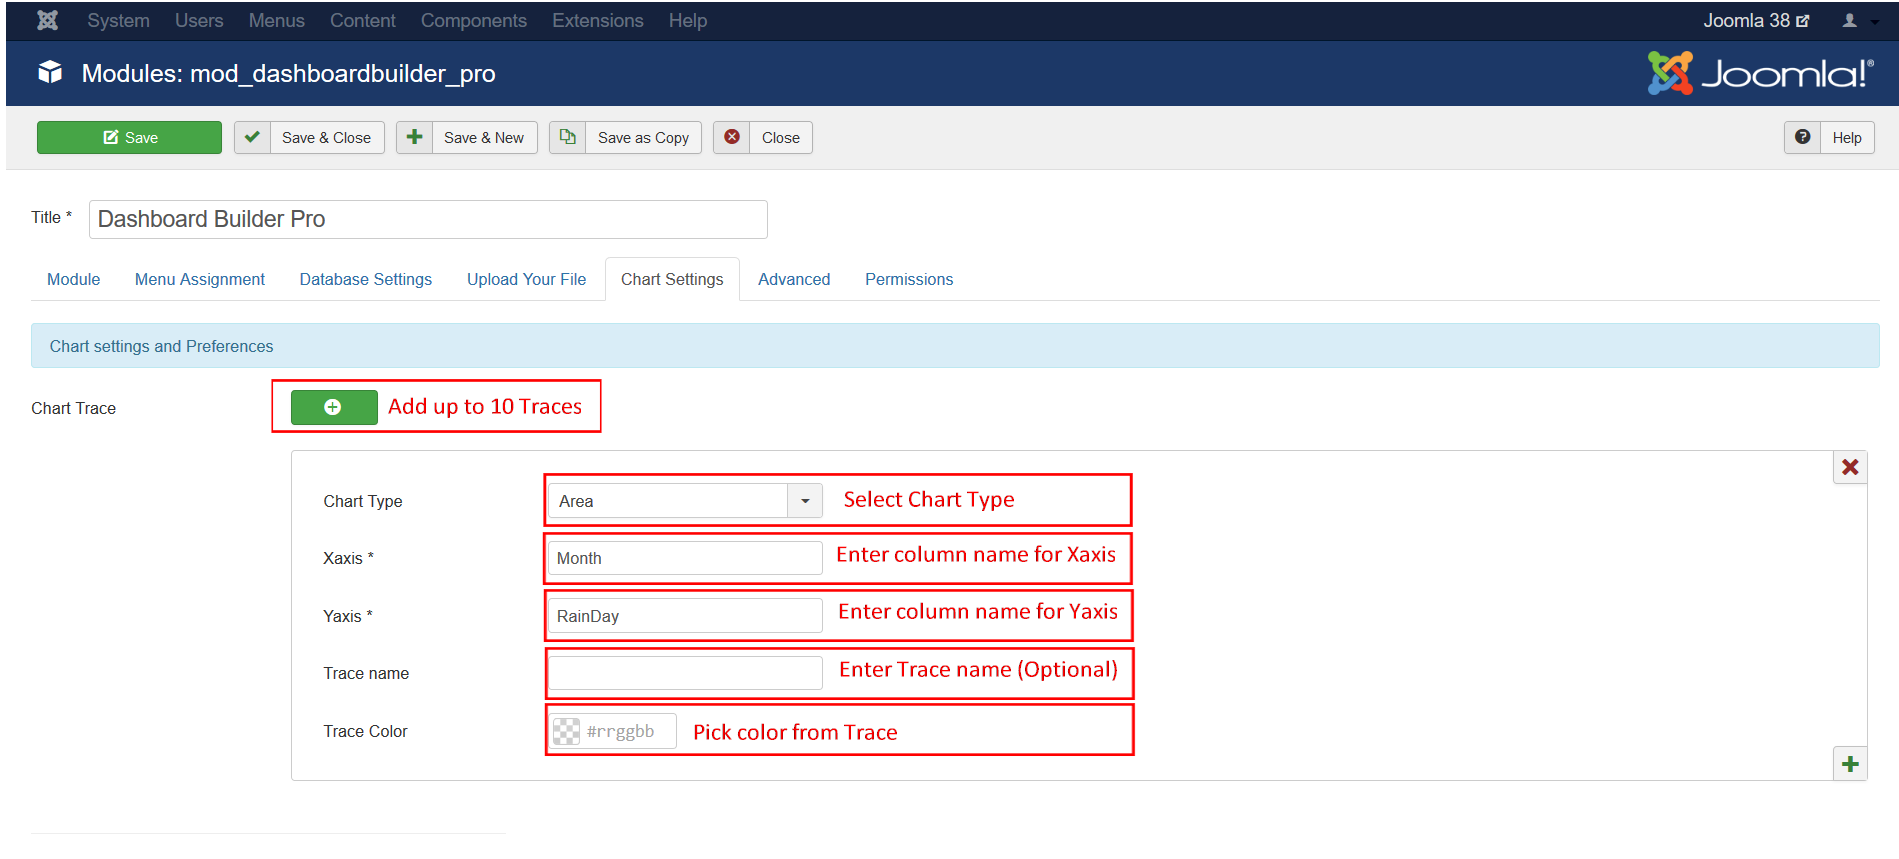
Under the Chart Settings Tab
- Select your chart type from the drop down list
- Enter your table, Excel or CSV's column name in Xaxis filed
- Enter your table, Excel or CSV's column name in Yaxis filed
- Enter your Trace name, this filed is an optional field.
- Select color from the color picker for Trace
Click (+) to add up to 10 Traces
Answer
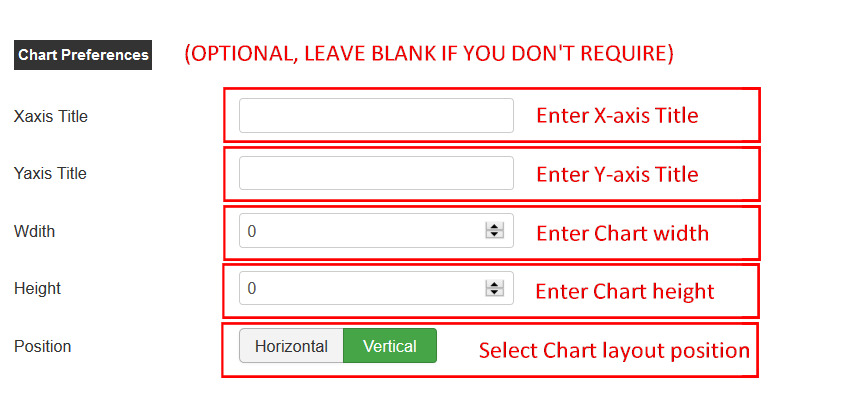
- Enter Title for Xaxis in Xaxis Title filed
- Enter Title for Yaxis in Yaxis Title filed
- Enter Chart width
- Enter Chart height
- Select chart layout position
Save your settings